
The Design Thinking Process: A Step-by-Step Guide

Table of Contents
What the Design Thinking Process Actually Is
Human-Centered Design vs. Traditional Problem-Solving
The Five Stages of Design Thinking
Stage 1: Empathize With Real Users
Stage 2: Define the Problem Statement
Stage 3: Ideate Without Filtering
Stage 4: Prototype Fast and Cheap
Stage 5: Test, Learn, and Iterate
How to Run the Process Step by Step: A Hardware Walkthrough
Design Thinking Examples From Product Development
Design Thinking Tools for Each Stage
Team Roles That Keep the Process Moving
Adapting the Process for Remote, Constrained, or Regulated Teams
Design Thinking Templates and Workshop Agendas
Common Failure Modes and How to Avoid Them
Frequently Asked Questions
Last Updated: October 7, 2026
What the Design Thinking Process Actually Is
The design thinking process is a structured, human-centered method for solving problems by understanding user needs, reframing challenges, generating ideas, building prototypes, and testing solutions through iteration. We use this approach daily to turn rough concepts into manufactured products.
Most teams treat design as decoration. They build first, then ask users what they think. That order is backwards.
Human-Centered Design vs. Traditional Problem-Solving
Traditional problem-solving starts with the solution. A team assumes it knows the answer, then builds toward it.
Human-centered design starts with the person. You watch how they work, where they struggle, and what they actually need. The problem often looks different than you expected.
This shift matters for hardware teams especially. A product that solves the wrong problem is expensive to fix after tooling.
The Five Stages of Design Thinking
The five stages of design thinking are empathize, define, ideate, prototype, and test. They are not a checklist. Teams loop back constantly, and that looping is the point.
Below is what each stage does, how to run it without wasting weeks, and the specific methods most teams skip.
Stage 1: Empathize With Real Users
Empathy means understanding user needs through observation and interviews, not surveys. Surveys tell you what people believe about themselves. Observation tells you what they actually do. Watch people use the product category you are entering, and ask them to show you rather than tell you.
Research methods that work:
Contextual interviews. Meet users where the work happens, the shop floor, the clinic, the kitchen. Ask about the last time they did the task, not the typical time. "Walk me through yesterday's refill" beats "How often do you refill?"
Think-aloud observation. Have users narrate while they work. Silence is data too; note where they pause.
Workaround inventory. Photograph every homemade fix, taped label, and sticky note. Those are unmet needs made visible.
Recruitment that avoids bias:
Sit with five to eight users per round. Beyond eight, you hear the same things again.
Recruit at least one extreme user, the person who does the task fastest and the person who struggles most. Average users hide the edges of the problem.
Do not recruit coworkers, friends, or anyone who knows the product team. They will be polite, and polite feedback is worthless.
Record exact quotes, not summaries. "I have to set it down to get the lid off" is a design brief. "Users want easier refills" is a guess.
Stage 2: Define the Problem Statement
A problem statement is one sentence that names the user, the need, and why it matters.
Weak: "Users want a better experience."
Strong: "Assembly line supervisors need a way to spot misaligned parts without stopping the line."
The second version gives your engineers something to build.
A useful check: read the statement aloud and ask whether two different teams would build the same thing from it.
Stage 3: Ideate Without Filtering
Ideation separates idea generation from idea judgment. Run brainstorming where no one critiques. Quantity first, quality later.
Use divergent thinking to expand, then convergent thinking to narrow. A common mistake is jumping to the safe idea in the first ten minutes. Push past it.
Facilitation specifics that keep ideation honest:
Silent sketching first, five to ten minutes where everyone draws instead of talks. This prevents the loudest voice from anchoring the room.
Build on others explicitly. "Yes, and" beats "yes, but."
Aim for 20 to 30 concepts before any discussion. The first ten are usually the obvious ones.
Stage 4: Prototype Fast and Cheap
A prototype is any rough version of the idea you can put in front of a user. Low-fidelity prototypes cost little and teach a lot.
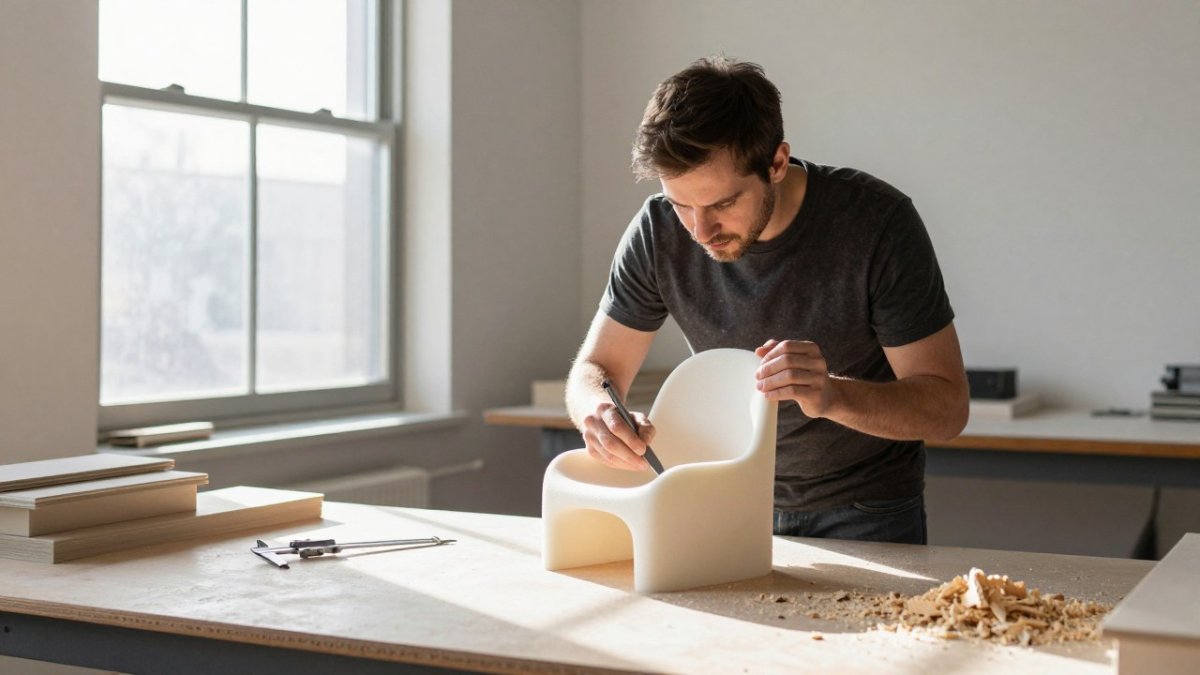
Foam models, cardboard mockups, and 3D-printed shells all work. Save high-fidelity prototyping for ideas that survived testing.
Match fidelity to the question you are asking. If you are testing whether a latch is intuitive, a foam model is enough.
Pro Tip Build three prototypes instead of one polished version. Users compare options more honestly than they evaluate a single design, and the comparison surfaces preferences they cannot articulate.
Stage 5: Test, Learn, and Iterate
Testing means putting the prototype in front of users and watching what happens. You are testing the design, not the person.
Measure outcomes, not opinions. Before the session, write down what success looks like. Useful measures include:
Task success rate. Did the user complete the task without help? Track it as a percentage across participants.
Time on task. How long did the refill take compared to the current product? Seconds are more honest than satisfaction scores.
Error rate. How many missteps before completion? Errors point to design problems, not user problems.
Decide whether to iterate or advance. A simple rule: if two or more participants hit the same failure point, fix the design before moving on.
Collect feedback, find the pattern, then refine. Iteration is where products get good. Most teams quit one round too early, plan for at least two rounds before you call a design validated.
How to Run the Process Step by Step: A Hardware Walkthrough
Here is the full design thinking process on one realistic project: a wall-mounted dispenser for a healthcare client.

Empathize (week 1). Observe nurses using the current dispenser. Note where they fumble.
Define (week 1). Write the problem statement: "Nurses need one-handed refills during patient care."
Ideate (week 2). Sketch 20 concepts. No filtering.
Prototype (week 3). Build three foam models with different latch designs.
Test (week 4). Put all three in front of nurses. Time the refill.
Iterate (week 5). Combine the two best latch features into one design.
Validate (week 6). Test the combined design with a 3D-printed shell.
Seven weeks, one clear winner. The old approach would have burned months on a single unvalidated concept.
Design Thinking Examples From Product Development
Design thinking examples show up in everyday products. A furniture maker watched customers assemble a bookshelf and found they skipped the instructions entirely. The redesign used tool-free joints.
Sprouts
A medical device team noticed clinicians held a handheld scanner at an awkward angle. A grip change cut scan errors.
The pattern is always the same: someone watched real use, and the design changed.
Design Thinking Tools for Each Stage
The right design thinking tools change by stage. You do not need expensive software to start, and most teams already own what they need.
Stage | Tool Type | Best For |
Empathize | Interview guides, observation sheets, a phone camera | Capturing user needs |
Define | Problem statement canvas, "how might we" prompts | Framing the challenge |
Ideate | Sticky notes, sharpies, a timer, dot stickers | Generating options fast |
Prototype | Foam, cardboard, hot glue, 3D printing | Testing cheaply |
Test | Feedback grids, task timing, a stopwatch | Measuring what works |
Pick one tool per stage. More tools slow the team down.
Team Roles That Keep the Process Moving
Name these roles before the first session. Without them, workshops drift.
Facilitator. Runs the agenda, watches the clock, and keeps the loudest voice from dominating. This person does not contribute ideas.
Note-taker. Captures exact quotes and decisions in one shared document. Rotate this role so no one is stuck writing all day.
Decision-maker. Has authority to kill an idea or greenlight a prototype. If this person is absent, the workshop produces homework, not decisions.
Prototype owner. Owns the build between sessions. One name per prototype, not a committee.
Adapting the Process for Remote, Constrained, or Regulated Teams
The stages stay the same. The logistics change.
Remote and distributed teams:
Run ideation in a shared digital whiteboard with silent sketching in breakout rooms. Voice-only calls flatten participation.
Ship physical prototypes to participants before the test session. A video call with a foam model in hand beats a screen share of a render.
Record sessions with consent so absent stakeholders can review the evidence rather than the summary.
Limited budgets and short timelines:
Compress empathize and define into one week by interviewing five users and writing the problem statement the same afternoon.
Substitute cardboard and foam for 3D printing when the question is about form or ergonomics, not fit or durability.
Run one test round with three prototypes rather than three rounds with one. Comparison teaches more per dollar.
Regulated products:
Bring compliance into ideation, not after. A concept that cannot be manufactured to standard is not a concept.
Document test sessions as you go. Regulators want to see the evidence trail, and reconstructing it later is expensive.
Add an accessibility review before final tooling. Check contrast, grip size, one-handed operation, and labeling against recognized accessibility guidance. Retrofitting accessibility after tooling is the most expensive mistake in this list.
Key Takeaway The process is not the tools. The tools just make the stages runnable. If a tool is slowing the team down, drop it and keep the stage. Design Thinking Templates and Workshop Agendas A simple design thinking template keeps a workshop on track. Here is a half-day agenda that can be used with client teams. 0:00-0:30, Frame the challenge and share user research 0:30-1:15, Empathy review: what did we hear and see 1:15-1:45, Write the problem statement as a group 1:45-2:30, Ideation: silent sketching, then share out Roles matter too. Name a facilitator, a note-taker, and a decision-maker before you start. Skipping the define stage is the most common failure. Teams rush from empathy straight to building, then discover in testing that they solved the wrong problem. That mistake costs tooling changes and months of rework.
Common Failure Modes and How to Avoid Them
Failure modes repeat across teams. Knowing them ahead of time saves money.
Solving for the loudest voice. Talk to quiet users too.
Prototyping too late. Build something rough in week one.
Ignoring constraints. Manufacturing limits belong in ideation, not after.
Testing with the wrong people. Recruit actual users, not coworkers.
For regulated products, add a compliance review before final tooling. Accessibility and inclusion checks belong in the same pass.
Frequently Asked Questions
What are the five stages of design thinking?
The five stages are empathize, define, ideate, prototype, and test. Empathize means observing and interviewing real users to understand their needs. Define turns those findings into a clear problem statement. Ideate generates a wide range of possible solutions. Prototype builds quick, low-cost versions of the strongest ideas. Test puts those prototypes in front of users and captures feedback that feeds the next round. The stages are not strictly linear, and most teams loop back several times before settling on a direction.
How long does a design thinking process take?
A focused workshop can run in one to three days, which suits early concept work and alignment. A full cycle that includes user research, multiple prototype rounds, and testing usually takes four to twelve weeks depending on product complexity. Hardware projects with tooling or regulatory review sit at the longer end. The practical rule is to time-box each stage, ship a rough prototype quickly, and let user feedback rather than internal debate decide when to move on.
What tools can teams use during the design thinking process?
Most teams need very little software. Whiteboards, sticky notes, and a shared document cover empathize and define. Interview notes and observation grids work well for user research. For ideation, use a shared board for brainstorming and dot voting. Prototyping benefits from foam core, 3D printing, and basic CAD for physical products. Testing calls for a simple feedback capture sheet. Templates for each stage keep sessions consistent and make it easier to compare results across teams.
What is an example of the design thinking process in practice?
A furniture maker noticed customers returning a storage unit because assembly instructions confused them. Empathy interviews revealed that buyers assembled it alone, often on a floor with poor lighting. The team reframed the problem around single-person assembly. Ideation produced several fastening concepts, and a low-fidelity prototype with color-coded parts went to five users. Testing showed assembly time dropped and returns fell. The final design kept the color coding, and the same approach was applied to two other products.
Hardware teams face a real challenge: the design thinking process only pays off when it connects to manufacturing reality. At 2B Studio, we run design-driven product development that balances user experience, marketplace demands, and production constraints from day one. Our prototyping services and creative design partnerships turn validated concepts into market-ready products. Say hi and let's build yours.
Say hi
Comments