
Turn Medical Device Ideas Into Market-Ready Products

Table of Contents
From Concept to Market: The Medical Device Development Roadmap
Step 1: Validate Your Medical Device Idea and Define Intended Use
Step 2: Conduct User Research and Establish Design Inputs
The Medical Device Prototyping Process: From Concept to Functional Prototype
Iterative Design and User-Focused Testing
Materials Selection and Design for Manufacturability
Step 3: Design Controls, Risk Management, and Verification
Design Control Framework: From Input to Output to Verification
Risk Management: Identifying and Controlling Failure Modes
Design History File and Traceability Documentation
Partnering With a Medical Device Design Firm for Regulatory Success
Reducing Medical Device Time to Market Without Sacrificing Quality
The Medical Device Development Process: From Design to Manufacturing Scale-Up
Manufacturing Strategy and Quality Management System Setup
Regulatory Pathway Planning and FDA Compliance
Frequently Asked Questions
Last Updated: October 11, 2026
From Concept to Market: The Medical Device Development Roadmap
Turning your medical device ideas market-ready requires a structured approach that balances innovation with regulatory reality. The path from concept to commercialization involves multiple critical phases: validating your core idea, understanding user needs, designing with manufacturing constraints in mind, managing risk systematically, and navigating regulatory requirements. At 2B Studio, we work with founders and product teams to transform medical device ideas into viable products that actually reach patients.
This roadmap breaks down the essential steps you'll face. Each phase builds on the last. Skip one, and you'll likely face costly delays or design rework later. The teams that move fastest are those that integrate manufacturing thinking from day one, not as an afterthought.
Step 1: Validate Your Medical Device Idea and Define Intended Use
Your first task is proving your idea solves a real clinical problem. Start by clearly defining what your device will do, who will use it, and what clinical need it addresses. This isn't a marketing pitch, it's a technical statement of intended use.
Talk to clinicians, patients, and healthcare providers who experience the problem you're solving. Ask specific questions: What's broken about current solutions? How do they work around limitations? What would change their workflow? Document these conversations. They become your design inputs later.
Define your device classification early. The FDA groups medical devices into three classes based on risk level (the FDA). Class I devices (like bandages) have minimal regulatory burden (the FDA). Class III devices (like pacemakers) require extensive clinical evidence. Your classification determines your entire development timeline and budget. Knowing this upfront prevents surprises.
Step 2: Conduct User Research and Establish Design Inputs
User research translates clinical needs into specific design requirements. Don't skip this step. Many teams jump straight to sketching without understanding what actually matters to users.
U.S. Food and Drug Administration
Conduct structured interviews with 8-12 end users. Watch them use existing solutions. Note friction points, workarounds, and unmet needs. Ask about physical constraints: hand size, dexterity levels, lighting conditions, sterile environments. These details shape every design decision.
Document your findings as design inputs, specific, measurable requirements your device must meet. Examples: "Device must fit in a standard surgical tray" or "Clinicians must complete the procedure in under 3 minutes." These inputs guide your prototyping work and later become your verification checklist.
The Medical Device Prototyping Process: From Concept to Functional Prototype
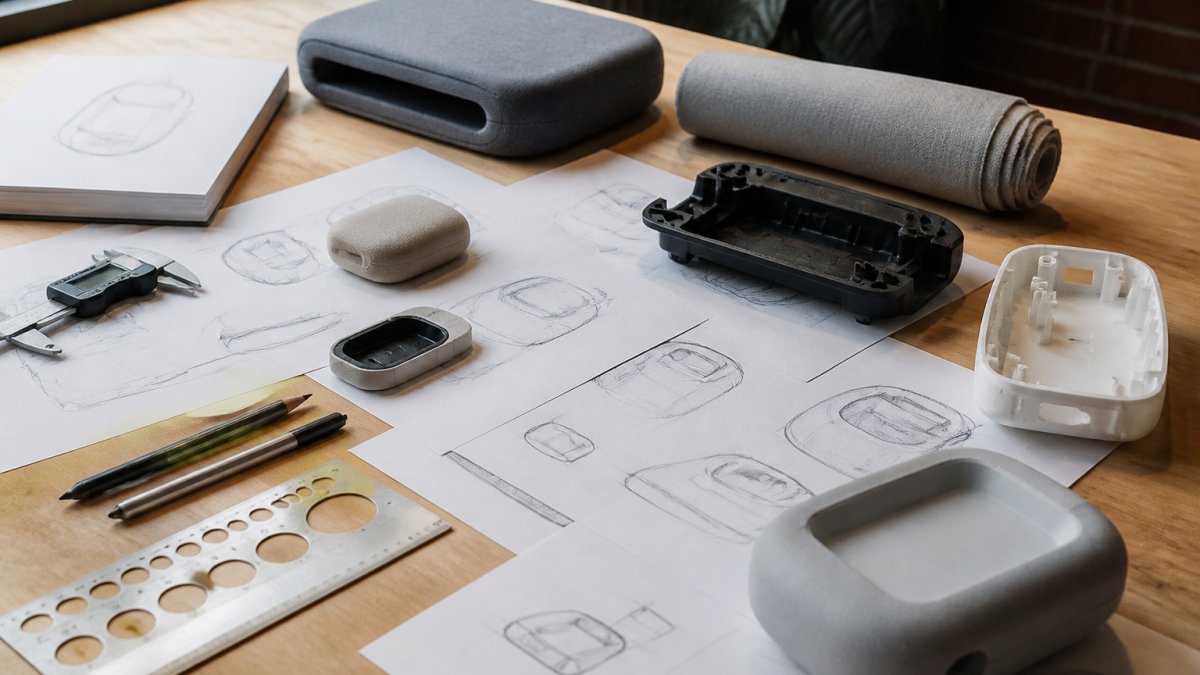
Prototyping isn't about building the final product. It's about testing assumptions cheaply and fast. Start with rough models using inexpensive materials. Move to functional prototypes only after you've validated core concepts.

Iterative Design and User-Focused Testing
Build your first prototype in 2-3 weeks using readily available materials. 3D printing, machining, and off-the-shelf components work fine here. The goal is learning, not perfection. Test this rough prototype with 3-4 users. Watch what breaks, what confuses them, what works better than expected.
Each test cycle reveals one or two critical insights. Fix those issues. Build the next version. Repeat this cycle 4-6 times. Teams that iterate quickly, testing every 2-3 weeks, compress their timeline significantly. Waiting months between prototypes wastes time and loses momentum.
Materials Selection and Design for Manufacturability
Once your design stabilizes, choose materials that work for both function and manufacturing. Biocompatible materials for patient contact, durable materials for repeated use, materials that scale to production volumes.
Think about how your device will be made at scale. A prototype hand-assembled in your lab won't work if manufacturing requires injection molding or precision machining. Design for the manufacturing process you'll actually use. This prevents expensive redesigns when you move to production.
Step 3: Design Controls, Risk Management, and Verification
Medical device development requires documented design controls, a structured system that links user needs to design specifications, testing, and risk mitigation. This is not bureaucracy; it is the framework the FDA expects and the system that prevents costly redesigns and safety failures.
Design Control Framework: From Input to Output to Verification
Design controls follow a documented sequence:
Design Inputs translate user needs and clinical requirements into specific, measurable design specifications. Examples: "Device must deliver 50 ± 5 microliters per actuation" or "User must complete setup in under 2 minutes without training." Document these inputs with traceability to your user research and clinical problem statement. Each input must have a verification method defined upfront.
Design Outputs are the actual specifications, drawings, software requirements, and material selections that implement those inputs. Every design output must map back to at least one design input. This traceability matrix, a table linking each input to its corresponding output, becomes your proof that you addressed every requirement.
Design Review occurs at three critical gates: concept (Does the approach solve the problem?), design freeze (Is the design complete and verified?), and pre-production (Is manufacturing ready?). Each review includes your design team, manufacturing partners, and regulatory advisors. Document what was reviewed, who attended, and what decisions were made. These records demonstrate to regulators that you validated your approach at each stage.
Verification Testing proves your device meets its specifications under controlled conditions. Verification is objective and repeatable. Examples: Does the needle penetrate tissue at exactly 50 grams of force? Does the display remain readable at 500 lux illumination? Does the battery last 8 hours of continuous use?
Validation Testing proves your device actually solves the clinical problem in real-world conditions. Validation often involves clinicians or patients using the device as intended. Does this design actually reduce procedure time? Do clinicians prefer it to existing solutions? Does it improve patient outcomes? Validation may include usability studies, pilot clinical data, or real-world performance monitoring.
Risk Management: Identifying and Controlling Failure Modes
Risk management is a parallel process that runs throughout design. It identifies what could go wrong and how your design prevents it.
Start with a Failure Mode and Effects Analysis (FMEA). List every component, every user interaction, every environmental condition. For each, ask: What could fail? What would be the consequence? How likely is it? How will you detect it? How will you prevent it? Rate each risk as high, medium, or low based on severity and likelihood.
For high-risk items, your design must include controls. If a needle could break inside a patient, your design might include a needle guard or material selection that prevents breakage. If software could crash during a critical operation, you might add watchdog timers or redundant processing. Document each control and verify it works.
Create a risk management file, a living document that tracks every identified risk, its mitigation, and verification that the mitigation works. This file is part of your design history and demonstrates to regulators that you systematically addressed safety.
Design History File and Traceability Documentation
Your Design History File (DHF) is the complete record of how you developed your device. It includes:
Design input and output specifications with traceability matrix
Design review records and decisions at each gate
Verification and validation test protocols and results
Risk management file with identified risks and controls
Design change records (every change after design freeze must be documented and re-verified)
Manufacturing specifications and process validations
Supplier and material certifications
The DHF is not created at the end; it is built throughout development. Assign one team member as DHF owner. At each phase, they ensure documentation is complete, traceable, and signed off. When you submit to the FDA, your DHF demonstrates that you followed a rigorous, documented process.
Teams that integrate design controls from the start, not as a last-minute compliance exercise, move faster because they catch design flaws early, when they are cheap to fix. Teams that treat design controls as an afterthought often face rework, delays, and regulatory rejection.
Partnering With a Medical Device Design Firm for Regulatory Success
Most teams benefit from working with experienced design partners who understand both product development and regulatory pathways. The right partner accelerates your timeline and prevents expensive missteps.
Look for firms with medical device experience, not just industrial design portfolios. They should understand design controls, risk management, and how to structure work for regulatory submissions. They should also have manufacturing relationships, knowing how to actually build what you design matters enormously.
2B Studio specializes in making medical device ideas market-ready through structured design partnerships. We balance manufacturing requirements, user experience, and regulatory demands. Whether you need prototyping support or comprehensive product development, we ensure your vision becomes a commercially viable device.
Reducing Medical Device Time to Market Without Sacrificing Quality
Speed matters, but not at the cost of safety or regulatory compliance. The fastest path isn't cutting corners, it's eliminating wasted time.
Run design phases in parallel where possible. Start manufacturing research while you're finishing design verification. Begin regulatory strategy planning during prototyping. Compress cycle times by testing more frequently with smaller changes between iterations.
The Medical Device Development Process: From Design to Manufacturing Scale-Up
Manufacturing Strategy and Quality Management System Setup
Your manufacturing strategy determines cost, quality, and timeline. Decide early: Will you manufacture in-house, partner with a contract manufacturer, or use a hybrid approach? Each has trade-offs.
Contract manufacturers bring expertise and scale. They also reduce your capital investment. But you lose some control. In-house manufacturing gives you control but requires significant investment and expertise. Most startups begin with contract manufacturers, then shift to in-house production at higher volumes.
Set up your quality management system before manufacturing starts. Document your processes, define acceptance criteria, establish traceability. The FDA expects this documentation. More importantly, it prevents quality failures that damage your reputation and patient safety.
Regulatory Pathway Planning and FDA Compliance
Your regulatory pathway depends on your device classification and intended use. Class I devices may need only a 510(k) submission showing substantial equivalence to existing devices. Class II and III devices require more extensive documentation and possibly clinical trials.
Start regulatory planning during design, not after. Work with regulatory consultants who understand your specific device class. They'll help you structure your documentation to support your submission. Many teams underestimate regulatory timelines. Budget 6-12 months for FDA clearance depending on your pathway. Planning early prevents last-minute scrambles that delay your launch.
Frequently Asked Questions
How do you turn a medical device idea into a market-ready product?
Start by validating your concept against real clinical needs and regulatory requirements. Define your intended use, conduct user research with healthcare professionals, and establish design inputs. Then move through iterative prototyping with user-focused testing, apply design controls and risk management, verify your design meets safety standards, and plan your manufacturing and regulatory pathway. This structured medical device development process has a timeline that depends on device complexity and risk classification.
What's the typical timeline for medical device prototyping and commercialization?
Medical device time to market depends on your device classification and regulatory pathway. Key timeline drivers include design iteration cycles, usability testing duration, manufacturing scale-up, and FDA review periods. Working with a medical device design firm experienced in your specific device class can help optimize timelines through parallel workstreams and early regulatory planning.
Why should we work with a specialized medical device design firm instead of a general product design agency?
A medical device design firm brings expertise in FDA compliance, design controls, risk management, and healthcare manufacturing that general agencies lack. They understand design input documentation, traceability requirements, and how to build manufacturability into early designs. They also know which regulatory pathway fits your device and can structure work to support R&D tax credits. This specialized knowledge prevents costly design pivots late in development and accelerates your path to market access.
What are the key phases in the medical device development process?
The medical device development process includes: concept validation and intended use definition; user research and design input documentation; iterative prototyping with user-focused testing; design controls and risk management implementation; verification and validation testing; manufacturing strategy and quality management system setup; regulatory pathway selection and FDA compliance planning; and finally design transfer to manufacturing and commercialization. Each phase has decision gates and deliverables that determine readiness to move forward.
Transforming a medical device idea into a market-ready product demands systematic thinking across design, manufacturing, and regulatory domains. Teams that integrate these perspectives from day one move faster and launch stronger products. 2B Studio helps hardware companies and medical device startups navigate this complexity, turning concepts into commercially viable products that actually reach patients. Say hi to discuss your project.
Say hi


Comments